Showing posts with label cookies. Show all posts

Monday, 14 December 2015

Bauble Macarons

The French biscuit gets a Christmas makeover. Glittery, delicate and festive, these baubles are almost too pretty to eat! Almost!
Bauble Macarons Cassie Cakes
How darling! Please note, I used glue to make this happen. Those fondant gold loops won't hold your macarons in the tree.
You know what my favourite time of the year is? If this is your first time to the blog, you may not guess that it's Christmas. You probably would guess though because this is quite obviously a Christmas post. What other time of year can you use glitter so liberally and unabashedly! None. No time. Christmas is all about glitter and sparkle and fairy lights and tinsel. Don't use tinsel though. Tinsel is passé.
Bauble Macarons Cassie Cakes
So few ingredients for so much MAGIC! Hey Santa. (salt and pepper shakers...)
Anyway. Glitter. Originally, I had planned on making candy cane macarons. And that would have been cool. Maybe next Christmas, they'll make an appearance. But when I did a quick google search, there were already so many! My candy cane macarons would get lost in the massive pile of already gorgeous cookie sandwiches. And to be honest, candy canes? Mint buttercream? How would that even work...
Bauble Macarons Cassie Cakes
The scales is your friend. This goes to..

Bauble Macarons Cassie Cakes
...these!
But my heart was set on macarons...how could I make them original? Given my predilection for all things loud and flashy, this was the natural choice. Bauble macarons! Covered in glitter with snowflakes, sugar pearls and gold bauble tops, these scream fun!

Bauble Macarons Cassie Cakes
Start these at least 24 hours before you need them. I could not be bothered making 48 of these. Power to you, if you do! I stopped at 20.
I used my macaron recipe from the Chocolate Cheesecake Macarons and I was a little nervous, as I have read that sometime the first time a person makes macarons, they can fluke it. Then the second time - fail. But nope! They turned out great! I followed the same tips as in the previous post. There are lots of details on the Chocolate Cheesecake Macaron post, but in brief the tips are...
Bauble Macarons Cassie Cakes
Make a little paste and paint the macarons to make them FABULOUS!
1. Room temp eggs
2. Sifted almond meal
3. Precisely mixed batter
4. Bang the tray with the piped macarons to get air bubbles out.
5. Let the piped macarons sit on the bench for 30 minutes to develop a "skin" and help create the "foot" of the macaron.
Bauble Macarons Cassie Cakes
 
Bauble Macarons Cassie Cakes
 
Bauble Macarons Cassie Cakes

So start with room temperature eggs. Bring cold eggs to room temp quickly by sitting them in warm water if need be. Once the egg whites are beaten and foamy, then it's time for the second tip...
Bauble Macarons Cassie Cakes
Thanks Mr Cakes for taking this photo! Legend.
Bauble Macarons Cassie Cakes

Sift the almond meal and icing sugar. Even if the almond meal is store bought, it can have larger bits of almond in it so sift to ensure a smooth cookie. Then add it to the egg whites and add colouring. Since I was making four different coloured macarons, I weighed the egg whites, and then weighed out the sifted icing sugar, to get four equal parts.
Bauble Macarons Cassie Cakes
Pretty.

Bauble Macarons Cassie Cakes
They make me think of Mardi Gras. Why is that? It's the Alyssa Edwards in me.
The ambiguous and crucial tip -  do not over mix or under mix the batter. Not the best for the most important step to be cryptic, but fold the batter deliberately and precisely. Assess the batter after each fold. The batter should be thick and flow like molten lava. I found that because some of the bowls of batter had to sit un-piped in bowls, it would need a few more folds before I piped it. So don't be too concerned if the batter thickens up while it's waiting.
Bauble Macarons Cassie Cakes
SO CUTE!
Once the batter is mixed, pipe out the shells on to the trays, using the template under baking paper then bang the trays firmly 3 or 4 times on the bench to bring the air bubbles to the surface then let the macarons sit to develop a skin, which helps give the biscuits a nice foot.
Bauble Macarons Cassie Cakes
How amazing is food glitter.
After all the trays are baked and the macarons have cooled, it's time to get glittering! Oh my goodness, it was so much fun to watch the macarons go from drab to fab! Using a bit of vodka, make a thick liquid with edible food glitter. Think nail polish thickness. Then get a painting!
Bauble Macarons Cassie Cakes
And they taste good too!

Don't worry about alcohol on the macarons, it will evaporate. Which could be a bad thing, depending on who you ask.


Bauble Macarons Cassie Cakes
Christmas achievement UNLOCKED!

Merry Christmas everyone! Two weeks to go!

Visit Four Weeks of Christmas Baking past!:
2015
Week 1 of Four Weeks of Christmas Baking: Chocolate Dipped Vanilla Shortbread

2014Week 1 of Four Weeks of Christmas Baking: Christmas Star Cherry Tart with Cinnamon Honey Roasted Macadamia Ice Cream
Week 2 of Four Weeks of Christmas Baking: Raspberry Jam Drops
Week 3 of Four Weeks of Christmas Baking: Rum Ball Trifle
Week 4 of Four Weeks of Christmas Baking: Eggnog Cake


Bauble Macarons
Use
this template  to ensure your macarons are even and consistently sized. Lie the template under baking paper and pipe the batter on. Make sure the template is removed before baking.

Prep time: 60 mins

Cooking time: 15 mins
Total time:  75 mins
 
Servings: 48 sandwiched macarons

Fondant Bauble Tops
White fondant - 30g will be plenty
Food colouring - yellow
Food lustre powder - gold

Macarons
6 large egg whites, free range, room temperature
Pinch of salt
1/2 teaspoon cream of tartar
100g caster sugar
400g icing sugar
2 cup/240g almond meal
Food colouring -  pink, blue, green

Edidble food glitter
Vodka

Vanilla Buttercream
250g butter, softewned
4 cups icing sugar, sifted
2 teaspoon vanilla extract

White food colouring
Bauble Tops - start at least 24 hours before use
  1. Colour white fondant yellow and take pea sized amount, form into a rounded pyramid shape.
  2. Flatten the top of the pyramid shape and create a hole on top with a skewer. Add details to the sides. Allow to dry slightly.
  3. Roll a small amount of fondant into a long, thin cylindrical shape, then create a loop.
  4. Use a small amount of water to affix the loop in the hole of the pyramid shape and allow to dry overnight.
  5. Brush with gold dust, if desired.
Macarons
  1. Preheat oven to 150°C
  2. Using a template to ensure the macarons are evenly sized, line a two trays with baking paper.
  3. Beat egg whites in the bowl of a mixer until egg whites are foamy.
  4. Add pinch of salt and cream of tartar and continue to beat egg whites,
  5. Slowly sprinkle in caster sugar and continue beating for around 8 minutes, until egg whites are stiff, peaks hold and do not collapse.
  6. Separate egg whites in to quarters, using scales to ensure each is the same size.
  7. Add food colouring to each of the four bowls - pink, blue, green and leave one bowl uncoloured.
  8. Sift almond meal and icing sugar in to a large bowl, then seprate in to quarters using scales. 
  9. Gently add one bowl of sifted almond meal and icing sugar into one bowl of egg white mix.
  10. With a flat spatula, gently and precisely fold the almond meal . Batter should be thick and flow off the spatula - think 'molten lava'.
  11. Repeat with each egg white mix.
  12. Pipe macarons using a large piping bag and open round tip.
  13. Allow piped macarons to sit uncovered on the bench for 30 minutes. A skin will form that feels tacky to the touch and does not leave a fingerprint.
  14. Bake for 15 minutes. Bake one tray at a time, on the same shelf to ensure they are baked evenly.
  15. Remove from oven and allow to cool completely.
  16. Add edible food glitter to small bowl, then add vodka using a teaspoon or dropper to add very small amounts at a time. Create a thick liquid and paint on to macaron tops. Allow to dry.
  17. Melt small amount of white chocolate and pipe snowflake pattern on to desired number of macarons and decorate with sugar pearls. Allow to dry.
  18. Use a small amount of buttercream to attach bauble tops.
Vanilla Buttercream
  1. In the bowl of a mixer, beat butter and icing sugar until creamy.
  2. Add vanilla and white food colouring and beat until combined and mix is smooth and creamy.
To assemble
  1. Match each macaron half with another of the same size.
  2. Using a round tip fitted on a piping bag, pipe a generous circle of buttercream on one biscuit then sandwich corresponding biscuit, pushing buttercream to edges.
  3. Store in an airtight container.


Sunday, 6 December 2015

Chocolate Dipped Vanilla Shortbread

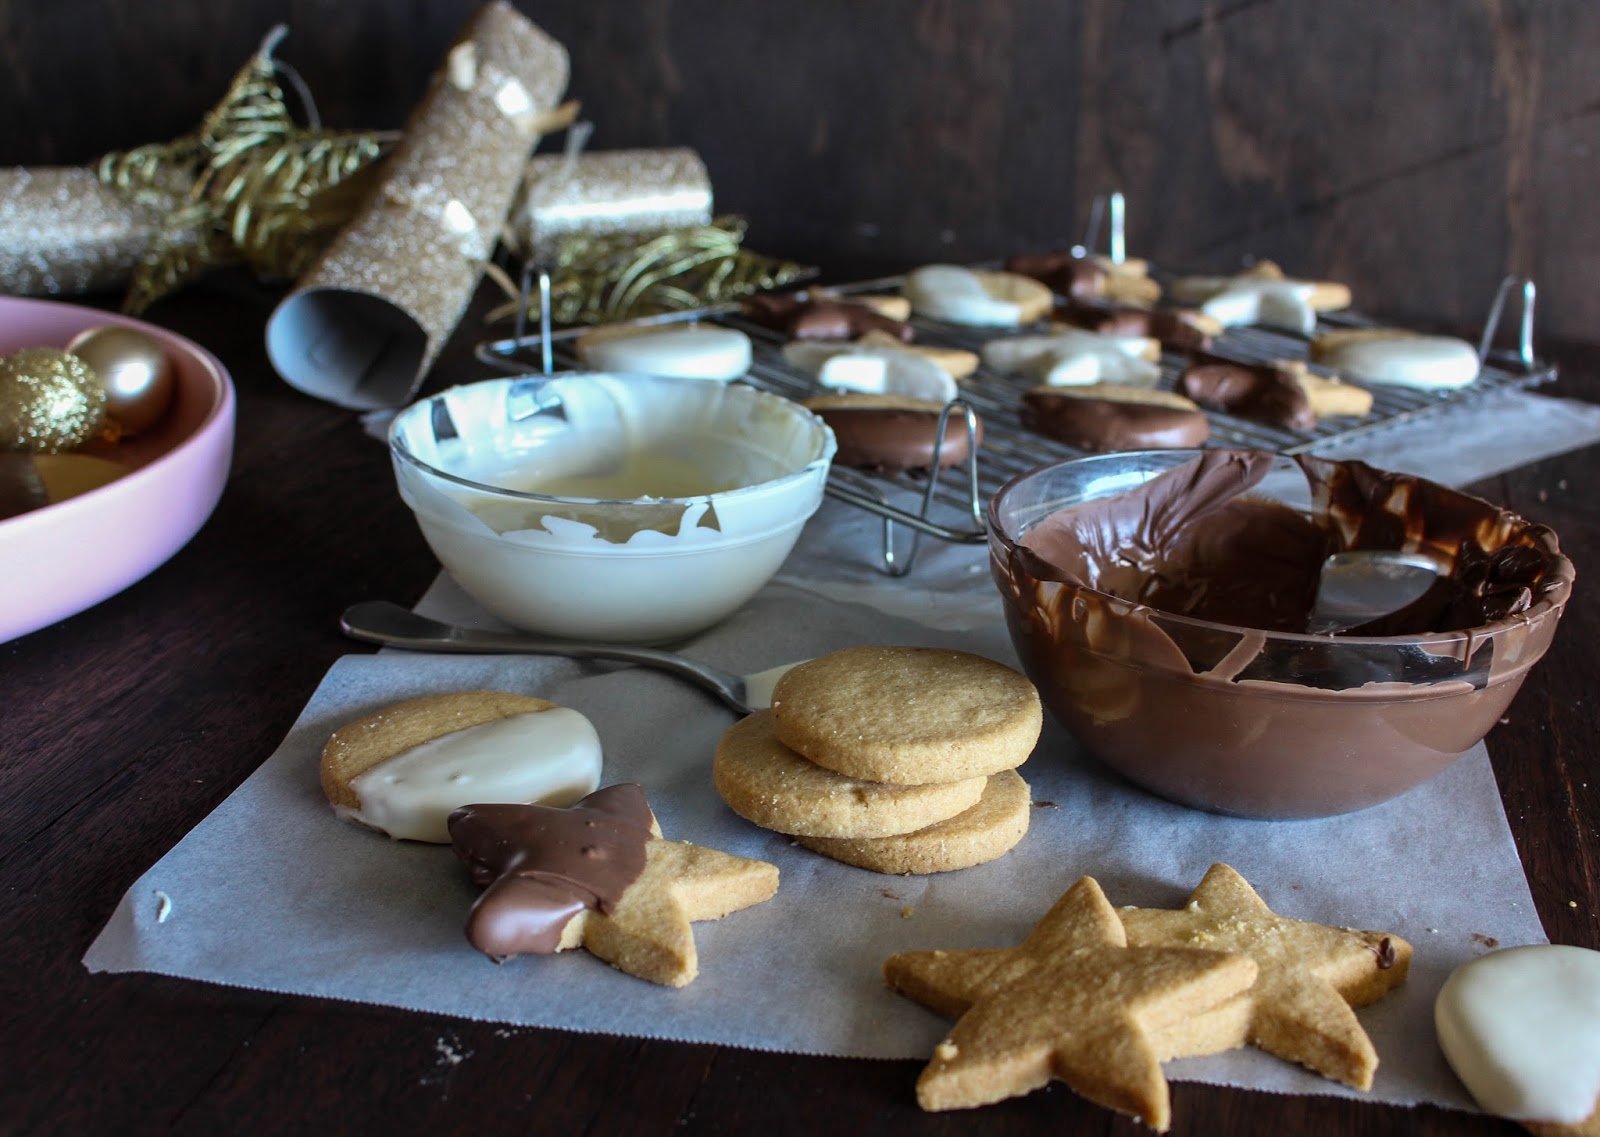
A delicious buttery vanilla biscuit , generously dipped in milk and white chocolate. Perfect to give as a homemade gift!
 
Cassie Cakes Chocolate Dipped Vanilla Shortbread

Oh my stars, look at this! The first week of the second year of Four Weeks of Christmas baking! Mull that over for a minute and figure out the time line then join me in a big fat YAY! My tree is up and shining beside me as I type and I have a Christmas candle burning, I really love this time of year.
Cassie Cakes Chocolate Dipped Vanilla Shortbread
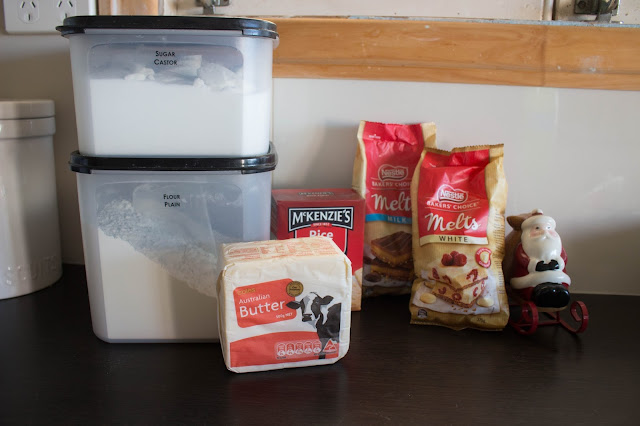
In December, we use salt and pepper from a Santa and Sack combo. That's how we roll.

 Is any other biscuit so quintessential Christmas as shortbread? How did that happen? Shortbread is Scottish, I know that much. But why is it associated with Christmas? I did a quick google and couldn't find an answer on the first two pages I clicked on so I'm stumped. If you know, please leave a comment and tell me!
Cassie Cakes Chocolate Dipped Vanilla Shortbread
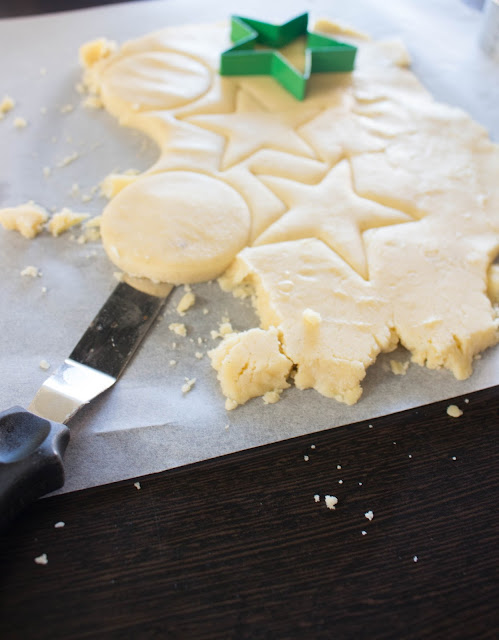
Little offset spatula. How handy you are.

Mr Cakes loves shortbread. Or he did. When I asked him the morning of baking the shortbread, he didn't seem too excited. He had just come off night shift so that might explain it, though anything Christmas related should be welcomed with a ridiculous amount of enthusiasm. That's how I live my life.
Cassie Cakes Chocolate Dipped Vanilla Shortbread
Little stars and maybe the circles are moons! A Christmas sky.

Shortbread gets its name from the 'shortness' of the dough, meaning it's buttery and has a high proportion of fat. The recipe traditionally is very simple with just butter, plain flour, rice flour and sugar as well as a dash of salt. There are many variations and commonly, the rice flour is substituted with cornflour. Cornflour will make a softer biscuit and rice flour gives a crisper, more crumbly biscuit. Ever the traditionalist - with baking at least - I use rice flour.
Cassie Cakes Chocolate Dipped Vanilla Shortbread
That pink dish cost me $20, it was more than 60% off. That is a Christmas miracle. But I had to bring it up the back stairs so Mr Cakes didn't see it as I have been spending waaaay too much money. How did it get here, he'll ask and I'll say "SANTA!"

I did stray ever so slightly by adding a vanilla pod to the dough. I wanted not only the amazing flavour of vanilla but I find those tiny black dots so pretty on the surface. Like their own teeny tiny baubles. Then I went further off the traditionalist path by dipping them in chocolate. And I don't think I need to explain that chocolate makes everything better. We all know that. That's science.
 
Cassie Cakes Chocolate Dipped Vanilla Shortbread
Bon-bons were half price too. And the pack said they're luxury bon bons. Bargain.

This is such a simple recipe, a really great one to do with little ones in the kitchen. I don't have any little ones (yesssssssss) but I do have puppies and they like to help too. Snuffling up any dropped bits of dough so quick. So helpful.
Cassie Cakes Chocolate Dipped Vanilla Shortbread
Pretty. God, I'm glad I bought that dish. I got one in mint too, which will definitely be making an appearance soon.

 Once the dough has been made, I like to roll the dough out on a piece of baking paper. This ensures less mess but also makes it easier to get the cut out cookies off the bench. When making stars, this is especially important as a little stickiness on the points of the stars came make them misshapen.


Cassie Cakes Chocolate Dipped Vanilla Shortbread
This shortbread is really yummy, the vanilla makes it pop. And the chocolate. Chocolate makes everything better.
These would make great gifts, they would look so pretty wrapped in a bit of cellophane and tied with a little red bow. Also, they're pretty inexpensive which counts around this time of year, so many expenses.

Cassie Cakes Chocolate Dipped Vanilla Shortbread
Remember to leave some cookies out for Santa!
I just ate a burrito and then had two of these delicious shortbreads and I tell you, I could get a second job as a shopping centre Santa. God, I'm so full.

Visit Four Weeks of Christmas Baking past!:

Week 1 of Four Weeks of Christmas Baking: Christmas Star Cherry Tart with Cinnamon Honey Roasted Macadamia Ice Cream
Week 2 of Four Weeks of Christmas Baking: Raspberry Jam Drops
Week 3 of Four Weeks of Christmas Baking: Rum Ball Trifle
Week 4 of Four Weeks of Christmas Baking: Eggnog Cake

Chocolate Dipped Vanilla Shortbread
Adapted from The Guardian shortbread recipe

Prep time: 10 mins

Cooking time: 27 mins
Total time:  37 mins

Servings: 24 cut-out biscuits

230g butter, softened
120g caster sugar
1 vanilla pod, scraped
260g plain flour
80g rice flour
150g milk chocolate
150g white chocolate
 
  1. Preheat oven to 150°C and line two cookie sheets with baking paper
  2. In a large bowl, beat the butter with a wooden spoon until soft then add the sugar and mix thoroughly.
  3. Scrape in the seeds from a vanilla pod and mix.
  4. Sift in both flours and mix to a smooth dough.
  5. Roll out dough to 1cm thickness and cut using assorted shaped cutters.
  6. Place on the prepared cookie sheets, at least 2cm apart and place in the fridge to chill for at 15 minutes.
  7. Bake each tray on the middle shelf of the oven for 27 minutes, or until cookies are just cooked.
  8. Allow to cool.
  9. Melt the chocolates in separate bowls, in the microwave in 30 second intervals.
  10. Dip each cookie in the melted chocolate and allow to dry.
  11. Enjoy!

Friday, 19 December 2014

GUEST POST: Brown Butter Ginger Cookies with Vanilla Mascarpone from Eatin' Mess


This week is the fourth week of my Four Weeks of Christmas baking but it won't be coming to you for a few days yet. In the meantime, I have for you a wonderful recipe from the lovely Laura from Eatin' Mess. Feast your eyeballs on these visual lollypops and head on over to Eatin' Mess for the full recipe!

Hi, I'm Laura and my blog Eatin Mess is all about the food I like to eat. From cocktails, to entertaining, to easy midweek meals. Today I am going to share a yummy and impressive, yet super easy Christmas treat.
 
Gingerbread. So festive! Although we don’t really have the right weather at Aussie Christmas time for nutmeg mulled wine, cinnamon spiced hot chocolate, or any other yuletide winter warmer that should be consumed pantless, in an oversized turtleneck, in front of a fire, for me, these flavours are still what it’s all about. Now gingerbread is classic Christmas but these are just a little more grown up. The gingerbread man has evolved. These are really easy, and although I would prefer, they don’t require a woollen sweater.


Saturday, 6 December 2014

Raspberry Jam Drops

Raspberry Jam Drops
Lovely soft biscuits with raspberry centres!

When I told my friends and colleagues about my second week of Christmas baking was Raspberry Jam Drops, most of them replied that it wasn't particularly Christmassy. I was a little perplexed as I do associate these crumbly, buttery biscuits with the festive period. They're a lovely thing to make to give wrapped up as a gift and so easy to make with just a handful of ingredients.
Raspberry Jam Drops
You probably have all these things in your pantry right now...what are you waiting for?! 
These Raspberry Jam Drops would also be a good recipe to do with little ones as they're simple and it's a lot of fun to poke your fingers into the little rounds of dough. The dough is very straightforward and could be done completely by hand. I think it's nice to do a whole recipe with just a bowl and a wooden spoon. Makes you feel more involved with the dough.

Raspberry Jam Drops
I should have taken a photo of the mixing bowl I used, it's one of my favourites. But this is the inside of the bowl...not as exciting is it. Oh well.


For these, I would recommend getting a really good quality jam. I went with raspberry for no other reason than it's my favourite. Any other jam would work too, even marmalade. I do think a red coloured jam is more suited to the season.

Raspberry Jam Drops
The little jam drops ready to go into the oven.


These make lovely presents, and they're easy to whip up the day before you gift them. They look lovely wrapped in cellophane with a nice piece of ribbon, like I have done or put into a jar. I'm slightly obsessed with Etsy and I purchased the tags in the photos from this shop here.

Raspberry Jam Drops
I was listening to Christmas carols while I made these, so they're infused with the spirit of Christmas.


These are so buttery and delicious. Homemade gifts are a meaningful and thoughtful gift plus you get to spend a relaxing bit of time in the kitchen!
Raspberry Jam Drops
While I was taking this photo, I saw the jam is a product of France...I'm just drawn to French things and I don't even know it.


Raspberry Jam Drops
All prettily wrapped up, ready to gift!

 
Raspberry Jam Drops
Buttery and soft.


Raspberry Jam Drops
Week 2 of Christmas baking done! Bring on Week 3!


Have a look back at the weeks of Christmas Baking past:
 
Week 1 of Four Weeks of Christmas Baking: Christmas Star Cherry Tart with Cinnamon Honey Roasted Macadamia Ice Cream
Week 3 of Four Weeks of Christmas Baking: Rum Ball Trifle
Week 4 of Four Weeks of Christmas Baking: Eggnog Cake


Raspberry Jam Drops
Prep time: 15 mins
Cooking time: 13 mins
Total time:  28 mins
 
Servings: 24
 
180g softened butter
1 cup caster sugar
1 egg
1 teaspoon vanilla extract
2 cups plain flour
1/2 teaspoon baking powder
Raspberry jam for centres

  1. Preheat oven to 180°C and line two trays with baking paper
  2. Beat the butter and sugar together in a medium bowl until butter turns paler in colour
  3. Add the egg and vanilla then beat to combine
  4. Sift in the flour and baking paper and mix until just combined
  5. Roll out heaped teaspoons full of batter and place on tray, leaving at least 10cm space between the cookies
  6. Press a finger deep into the centre of each cookie and fill the cavity generously with jam
  7. Bake each tray for 13 mins or until cookies are just golden on the edges
  8. Allow to cool and enjoy!

Monday, 15 September 2014

Chewy Chunky Cookies! aka Anger Cookies


Cassie Cakes Chewy Chunk Cookies
Something fantastic came from my anger!
There are many types of biscuits in the world, but my favourite would have to be big, chewy cookies full of chunks! I like the soft ones that melt in your mouth with that hint of chewiness when you bite in - dare I say the American style ones?  
Cassie Cakes Chewy Chunk Cookies ingredients
Cornflour, what chu doing in this photo? You ain't needed!

These particular cookies came about from a bit of an unusual scenario. You'd think cookies would be made in the kitchen on a Sunday with the afternoon sun streaming in the bay window, while forest creatures sing a Disney princess song. Well, these cookies were created at about 10pm on a week night when I was fighting with Mr. Cakes about the volume of the television in our old tiny apartment. I decided to create my own noise. What better than get the electric beaters out and make cookies in a steel bowl?
 
Cassie Cakes Chewy Chunk Cookies the start of the magic
The start of the magic.

And that's how they got the name in our household of Anger Cookies. Really, what a way to try and win a fight. But at least we both saw the humour in it the next day and we had cookies! And I now have this amazing cookie recipe!

Cassie Cakes Chewy Chunk Cookies batter
It's a nice soft batter that's a blank canvas for your imagination!

There are a few things which make these cookies so good. First of all, there's a fair amount of oil in it which creates a really moist, gooey cookie. I add butter as well because I think that gives a good depth of flavour.

Cassie Cakes Chewy Chunk Cookies double choc and pecan
Double choc pecan. Pretty classic combination...so good.
The second tip that I can give you is about flour. It's always about flour. Seriously, good quality flour makes the world of difference in all my baking. In cakes and cupcakes, I insist on using a low protein flour which makes them soft and fluffy but with cookies, you want them to have a bit of bite and strength to make them chewy. So use a strong or '00' flour if you can get it, or normal, good quality flour.
Cassie Cakes Chewy Chunk Cookies caramel and pretzel
This is the flavour combo of late 2014, I tells ya.


And finally, the third thing about these cookies are the CHUNKS! Heaps of them! It's in the name, you guys. And so is anger but I told you about that already. So usually I put dark, milk and white chocolate and chop up some caramel chocolate to put in there too but this time I decided to split the mix up and make two types. In one bowl I put pecans, dark chocolate melts and white chocolate chips.
oooooh what smells better than fresh cookies!

And the other, caramel chocolate and pretzels. You guys, you heard it here first: pretzel is the new salted caramel. You're gonna start to see it everywhere! And I'm never one to shy away from a food trend! So I decided to try it out too! I liked it, it's a bit different.
Cassie Cakes Chewy Chunk Cookies up close
I like to leave whole pieces of the caramel chocolate in the mixture so it goes molten and gooey.
These cookies are gooey in the centre so if you like a firmer cookie, bake for 12 mins, instead of 10. This recipe double and halves really well too! 
 
Cassie Cakes Chewy Chunk Cookies fresh out of the oven
So good fresh out of the oven.

Give these cookies a go, they're super easy and really yummy!
Win.
Cookie heaven!


Cassie Cakes Chewy Chunk Cookies with milk
Serving suggestion! Serving demand, more like.


Chewy Chunky Cookies

Prep time: 10 mins plus cooling
Cooking time: 10 mins
Total time:  20 mins plus cooling
 
Servings: 22 large cookies 
 
4 large free range eggs
1 1/3 cup brown sugar
3/4 cup caster sugar
1/2 cup (115g) soft butter
2 cups plain flour - preferably strong/00 flour
1 1/2 cups self raising flour

1 teaspoon bicarbonate soda
1 teaspoon baking powder
1/2 cup vegetable oil
Up to 5 cups of chunks  eg.
1 cup of chopped pecans
1 cup roughly chopped dark chocolate melts
1 cup white chocolate chips1 cup chopped pretzel pieces1 cup caramel chocolate
 
  1. Beat the eggs and sugars in a bowl until the mixture turns lighter in colour, about 2 minutes.
  2. Beat in the soft butter for about 2 minutes. If there are small lumps of butter, don't worry as these will be beaten out once the flour is added.
  3. Sift in flours, bicarbonate soda and baking powder and stir with a wooden spoon until incorporated.
  4. Add the oil and chunks (split the mixture in two if desired and add chunks to each) and stir with a wooden spoon until incorporated.
  5. Refrigerate, covered, for at least one hour.
  6. Preheat oven to 180°C
  7. Using an ice cream scoop, or by rolling large balls by hand, place mounds on tray, about 8 cms apart. I can get about 6 to a large cookie sheet.
  8. Bake for 10 mins for soft gooey cookies, and 12 for firmer cookies.
  9. Allow to cool slightly before enjoying!
Powered by Blogger
Design byJasmineJoy